Slow Hot Chocolate

Slow Hot Chocolate

With food, as with life, you get out what you put in. Returns are proportional to investment. It shouldn’t come as a surprise that dumping two scoops of powder into a mug of hot milk isn’t an immersive experience. More often than not you end up with a too-sweet, flavorless mugful of swill with a layer of sludge at the bottom. Devotion to this routine has more to do with nostalgia than good taste. Why not try a little harder? Just a bit.

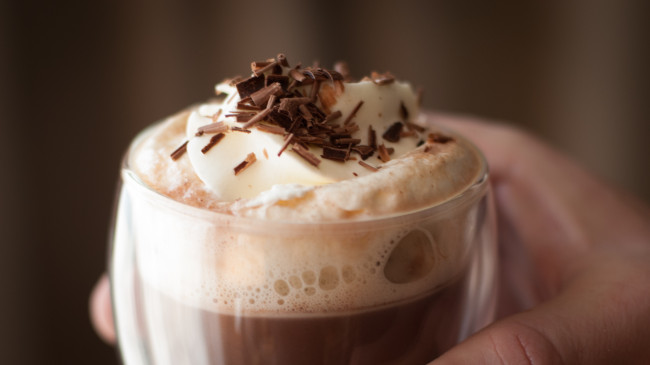
A rich cup of hot chocolate starts with good chocolate. Pick your poison. I prefer dark chocolate in the 60% range for this recipe – something good like Scharffen Berger, Valrhona or TCHO. I keep the additional flavors to a minimum: a touch of vanilla, a dash of cinnamon and a pinch of salt (to help the chocolate “pop”). Another option is just a bit of cayenne to add a little heat. In our house, fresh whipped cream on top is a requirement. Maybe a dusting of grated chocolate if you’re trying to impress someone.

For all the talk of slow hot chocolate, this simple recipe comes together in about 15-20 minutes. Enough time to appreciate the ritual; not so long as to be discouraging. Drink up and slow down.

Yield
This recipe will produce about 26 ounces, enough for 4 reasonable servings. You can also make this ahead and keep it in the refrigerator for 24 hours or so.

Ingredients

  • ¼ cup water
  • ¼ cup granulated sugar
  • 6 oz. chocolate rough chopped (see note above)
  • 24 oz. whole milk
  • ½ teaspoon vanilla extract
  • Dash of cinnamon
  • Pinch of sea salt
  • Fresh whipped cream
  • Chocolate shavings (optional)

Method

  1. In a medium saucepan over low heat, dissolve the sugar in the water.
  2. Add the chocolate, stirring constantly with a whisk to prevent scorching.
  3. Once the chocolate is melted, add the milk and stir regularly, making sure there isn’t any chocolate lingering on the bottom of the pan – mix it in well.
  4. Add the vanilla, cinnamon, and salt and continue stirring over low heat.
  5. Test the temperature with your finger or some more scientific technique, removing it from the heat when it’s a little hotter than your preferred temperature.
  6. Pour in the hot chocolate into you vessel of choice, leaving some room at the top of the glass.
  7. Top off each glass with more whipped cream and perhaps some chocolate shavings, if you’re feeling so bold.
  8. Variation: A pinch of cayenne pepper to give the chocolate some heat.

Yummy Lovin’ Chocolate Chip Cookies

yummyLovinChocolateChipCookie

My interest in baking began back in the fall of 1992. I was a sophomore at San Marin High School (go Mustangs!), dating a girl from my English class. She was the daughter of a minister. I was nervous.

One afternoon as the holidays neared, I went over to her house for some parent-approved cookie baking—just the kind of thing that a girlfriend’s mother loves. I had baked chocolate chip cookies before, always carefully following the recipe on the back of the chocolate chip package. So I was confused that my girlfriend and her mother were deviating from the time-tested wisdom of Toll House. Nothing dramatic mind you, just a bit more flour and a bit less time in the oven for softer cookies. The results were delicious, I’m sure the word “awesome” was used several times.

I brought some cookies to school the following week. I shared a few with my buddies and classmates. They gobbled them up and asked for more. I started taking orders. I made enough money over the course of two weeks to cover Christmas shopping that year. I’m pretty sure I was the only guy on the football team with a side business as a baker.

The girlfriend only lasted 3 months, but I’ve been in love with the cookies for over 20 years. It has been modified countless times over the years, but still draws from its ancestral roots: the Original Toll House recipe. That being said, I still call it my own.

These cookies are chocolate-heavy and very soft. Use the best ingredients you can find—it makes a real difference in the final product. I hope you enjoy.

Yield
About 18-20 cookies. This recipe is just begging to be doubled.

Ingredients

  • 2 ½ cups all-purpose flour
  • 1 teaspoon baking soda
  • 1 ¾ teaspoon salt
  • 1 ¼ cups (2.5 sticks) unsalted butter at room temperature
  • ¾ cup granulated sugar
  • ¾ cup packed brown sugar
  • 1 teaspoon vanilla extract
  • 2 large eggs at room temperature
  • 2 cups (12 oz. package) semi-sweet chocolate chips
  • 4 ounces semi-sweet or bitter-sweet chocolate (shredded on a box grater)*

Method

  1. Combine flour, baking soda, and salt in a medium bowl. Set aside.
  2. Mix butter, granulated sugar, brown sugar, and vanilla extract in a large bowl or (if you have one) a stand mixer with the paddle attachment.
  3. Add eggs to butter/sugar mixture one at a time, beating well after each addition.
  4. Gradually beat in flour mixture. I usually add it in three parts.
  5. Mix in shredded chocolate.
  6. Stir in chocolate chips. At this point, the dough is very thick. Get in there with your (clean) hands to work in the chips.
  7. Portion the dough with a scoop (I use a 2 ¾ ounce blue scoop). Place the portioned scoops close together on a parchment-lined sheet pan.
  8. Pat the scoops down slightly, cover with plastic wrap and then slip the portioned dough into the refrigerator for at least two hours.
  9. Preheat oven to 375 F. Adjust rack to middle position.
  10. Remove six dough scoops from the refrigerator and place them on a sheet pan lined with parchment paper or Silpat.
  11. Bake for 12-15 minutes. They should look a bit undercooked. (cook for less time if you portioned smaller)
  12. Slide parchment paper and cookies directly onto cooling racks. The cookies are very soft and can fall apart quite easily when warm.
  13. Let the cookies cool for minimum 20 minutes before gorging yourself.

* This part, admittedly, sucks. But it is worth the effort.